

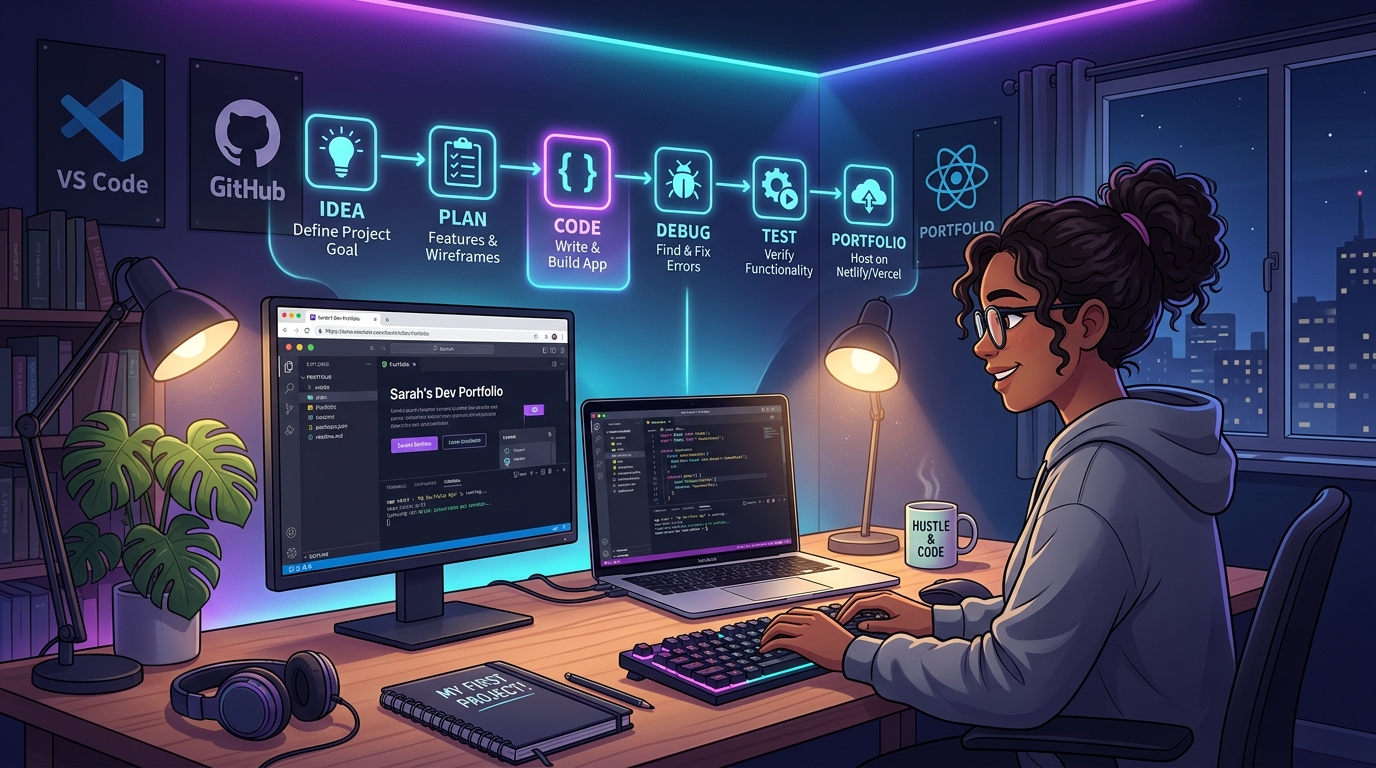
One of the biggest turning points in a beginner's programming journey is building their first real-world project without following a tutorial step-by-step. Learning syntax, loops, functions, React components, APIs, or database queries gives you foundational knowledge. But building a real-world application teaches you how to combine that knowledge to solve an actual problem.
Your first project does not need to be a massive commercial application. You don't need to build the next Instagram, Amazon, or ChatGPT. Instead, start with a focused, small-scale application that solves a simple, tangible problem and systematically add functionality one milestone at a time.
This comprehensive guide explains how to build your first coding project from initial concept to live cloud deployment, even if you are still an absolute beginner. You will learn how to define requirements, design an MVP, debug runtime crashes, configure version control with Git, write professional documentation, and transform your code into a resume-worthy career asset.
🎁 Download Free: First Coding Project Starter Kit
Ready to build your first real coding project? Download our free 9-page First Coding Project Starter Kit featuring 50 beginner project ideas, project selection checklist, requirements template, MVP planning sheet, GitHub README template, testing checklist, and resume bullet templates.
Why Should Beginners Build Coding Projects?
Projects help transform theoretical knowledge into practical, instinctive engineering skills. Watching video courses provides familiarity, but building software forces you to make active design and architecture decisions, including:
- Architecture: How should the folder structure and components be organized?
- Data Modeling: What data structures do I need, and where should state live?
- Persistence: Should data be stored in browser LocalStorage or a cloud database?
- User Interaction: How do buttons, forms, and validation states react to user input?
- Resilience: What happens when a network request fails or an unexpected null value arrives?
- Verification & Delivery: How do I test critical user paths and deploy the code live?
Projects also reveal your true knowledge gaps. For instance, you might feel completely comfortable with JavaScript arrays in a multiple-choice quiz. But when building a live project, you suddenly realize you need to filter dynamic search results, sort rows chronologically, update nested state immutably, and handle asynchronous rendering without freezing the DOM. That realization is invaluable because you now know exactly what to study.
📊 What Developer Research Shows
According to the Stack Overflow 2025 Developer Survey (encompassing over 49,000 professional developers across 177 countries), 69% of respondents actively learned new coding techniques or languages in the preceding year, and nearly 68% utilized official technical documentation as their primary learning resource. Software development is fundamentally a continuous-learning trade: the developers who excel are not those who memorize syntax, but those who can take an idea, read documentation, and engineer a working solution.
To avoid common pitfalls in the early stages, review our guide on common coding mistakes beginners make before starting your project.
What Makes a Good Beginner Coding Project?
Not all project ideas are suitable for beginners. An effective beginner project meets four criteria:
1. Small Enough to Finish
A finished 3-feature project teaches you ten times more than an abandoned 50-feature clone. Focus on finishing what you start.
2. Difficult Enough to Stretch You
If you have already built a basic calculator, don't build another calculator. Move to state management, APIs, or local persistence.
3. Aligned With Your Learning Path
Build projects that directly reinforce the specific languages and frameworks you want to be hired for.
4. Possible to Explain in an Interview
You must be able to clearly describe the problem, the tech stack, the architectural tradeoffs, and how you solved edge cases.
| Learning Path | Ideal Beginner Project | Key Skills Exercised |
|---|---|---|
| Vanilla JavaScript | Expense Tracker & Budget Log | DOM manipulation, Events, LocalStorage, Array methods |
| React / Frontend | Interactive Task Manager with Filters | Component state, Props, Hooks (useState, useEffect), Reusable UI |
| Python | Automated File Organizer & Scraper | OS modules, File I/O, Error handling, Scripting automation |
| Backend / Node.js | RESTful Notes API with PostgreSQL | Express routing, CRUD endpoints, SQL schema design, Status codes |
| Full Stack (MERN / Java) | Student Management System | Full CRUD lifecycle, Database ORM, API integration, UI state |
| .NET / C# | Employee Records Portal with SQL Server | ASP.NET Core, Entity Framework Core, LINQ, Typed Models |
Step 1: Choose the Right Project Idea
Do not spend three weeks searching for a groundbreaking, billion-dollar startup concept. The primary objective of your first project is learning, not invention. Pick a well-understood, classic problem so that you can focus 100% of your mental energy on implementation and debugging rather than guessing product requirements.
💡 Proven Beginner Project Candidates
To-Do List with Categories • Personal Expense Tracker • Interactive Quiz Application • Markdown Notes App • Live Weather Dashboard • Student Management System • Library Book Management System • Recipe Box with Tag Search • Personal Developer Portfolio • Daily Habit Tracker
If you're still weighing which stack to master first, explore our comprehensive guide on programming languages to learn in 2026.
Step 2: Define Your Project Requirements
Before writing a single line of code or creating a folder, write down in plain English what the application should accomplish. Jumping straight into your code editor without written specifications is the fastest route to getting stuck midway.
Suppose you are creating a Student Management System. Your initial functional requirements should look like this:
1. Add Student: Form with Name, Email, Phone, Course, and Enrollment Date.
2. View Students: Display all enrolled students in a clean table or card list.
3. Edit Student: Allow updating student contact details and course selection.
4. Delete Student: Remove a student record with a safety confirmation prompt.
5. Search Students: Filter records in real-time by student name or email address.
6. Validation: Prevent submission if required fields are missing or email is malformed.
This simple document defines your exact scope. When feature ideas pop into your head while coding (e.g., "What if I add biometric fingerprint scanning?"), you can refer to your requirements sheet and keep your project on schedule.
Step 3: Choose Your Technology Stack
Don't select technologies just because they are trending on social media. Choose technologies that align directly with your current learning level and career roadmap:
Frontend Web Beginner
Perfect if you are in your first 2 months of programming:
Full Stack Web Application
Following the full stack developer roadmap:
Enterprise .NET Developer
Following the .NET developer career path:
Python Backend & Data
Following the Python developer roadmap:
Comparing architectures? Check out our in-depth comparison of MERN vs Java Full Stack to make an informed choice.
Step 4: Break the Project Into Small Tasks
Writing "Build Student Management System" on your to-do list creates overwhelming cognitive friction. It's too large and amorphous. Break the project down into bite-sized, conquerable engineering tasks:
│
├── 1. Setup & Repository
│ ├── Initialize Git repository and .gitignore
│ └── Create basic folder architecture (src, components, styles, data)
│
├── 2. User Interface (UI)
│ ├── Navigation Header & Dashboard Layout
│ ├── Student Summary Table / Cards
│ └── Add / Edit Modal Form
│
├── 3. Core Functionality (CRUD)
│ ├── READ: Display hardcoded mock student records
│ ├── CREATE: Wire up form submission to add new student to state
│ ├── DELETE: Implement remove button with confirmation dialog
│ └── UPDATE: Pre-populate edit form and save updated record
│
├── 4. Search & Validation
│ ├── Add live filter for student name and email
│ └── Form validation: ensure valid email format and required fields
│
└── 5. Polish & Deployment
├── Responsive mobile styling
├── Comprehensive README.md with screenshots
└── Deploy live to Vercel / Netlify / Render
Now the project is no longer an intimidating monolith. It is a sequence of discrete, achievable 30-minute programming sprints.
Step 5: Design the Project (Wireframe Before Code)
You don't need to be an expert UI/UX designer. Grab a blank sheet of paper or use a free tool like Excalidraw or Figma to sketch the screen layout before opening your code editor:
| 🎓 Student Management Portal [ + Add New Student ] |
+-------------------------------------------------------------------------+
| |
| Search: [ Enter student name or email... ] [ Filter: All ] |
| |
| +-------------------------------------------------------------------+ |
| | ID | Name | Email | Course | Actions | |
| |------|---------------|-------------------|------------|-----------| |
| | #101 | Rahul Sharma | rahul@example.com | Full Stack | Edit Del | |
| | #102 | Anita Patel | anita@example.com | Python AI | Edit Del | |
| | #103 | Vikram Rao | vikram@test.com | .NET Core | Edit Del | |
| +-------------------------------------------------------------------+ |
| Total Enrolled: 3 Students |
+-------------------------------------------------------------------------+
Knowing exactly what elements need to be on screen saves hours of wandering CSS adjustments and keeps your HTML structure semantic.
Step 6: Start Building the MVP (Minimum Viable Product)
An MVP (Minimum Viable Product) is the simplest possible version of your application that solves the core problem. When building Version 1.0, resist the urge to add premature complexity:
✅ What to Build in Version 1.0 (MVP)
- Student input form (Name, Email, Course)
- Student list rendering in a table
- Add new student button
- Delete student button
- Basic input validation
❌ What to Delay for Later Versions
- JWT / OAuth authentication
- Complex role-based permissions
- Dark/light theme toggle
- AI-powered course recommendations
- SMS and WhatsApp notifications
Step 7: Add Functionality One Feature at a Time
Adopt an incremental, feature-by-feature development rhythm. Never attempt to code the form, the table, the database connection, the API routes, and the validation all at once. If you write 400 lines of code across four files and reload your browser to a blank screen, locating the bug is a nightmare.
Instead, follow this sequential cadence:
- Feature 1: Build the static HTML table and verify mock data renders correctly.
- Feature 2: Build the input form and verify the submit handler captures inputs.
- Feature 3: Wire up form submission to append a new item to state. Verify the table updates.
- Feature 4: Implement the delete button and verify the correct row is removed.
- Feature 5: Implement edit mode to pre-fill the form and save updates.
- Feature 6: Add the real-time search filter input.
- Feature 7: Add form validation rules (email regex, required non-empty strings).
Step 8: Learn to Debug Your Project Like an Engineer
When you encounter a red error message in your browser console or terminal, don't panic. Errors are not a sign of failure; they are the standard daily feedback loop of software engineering.
⚙️ The 6-Step Debugging Protocol
Cannot read properties of undefined (reading 'map'))2. LOCATE: Look at the stack trace to identify the exact filename and line number.
3. ISOLATE: Check what the variables at that line actually contain using
console.log() or breakpoints.4. HYPOTHESIZE: Formulate why the value is undefined (e.g. initial fetch hasn't completed yet).
5. APPLY FIX: Add optional chaining (
data?.map) or a loading state condition.6. RETEST: Reload and verify the fix solves the issue without introducing regressions.
Step 9: Test Your Application Beyond the Happy Path
Most beginners only test the "happy path" — entering clean, valid data and checking if it works. Real users will enter unexpected, invalid, or chaotic inputs. Test your application against these essential scenarios:
| Test Case Type | Sample Input | Expected Application Behavior |
|---|---|---|
| Valid Submission | Name: "Rahul Sharma", Email: "rahul@test.com" | Record is created, form resets, confirmation banner shown. |
| Empty Fields | Name: "", Email: "" | Form stops submission, red error message displayed under fields. |
| Malformed Email | Email: "notanemail" or "rahul@" | Error: "Please enter a valid email address". |
| Duplicate Records | Adding "rahul@test.com" a second time | App detects existing email and informs user. |
| Empty State | No students enrolled yet / search yields zero matches | Displays clean empty state illustration rather than a broken blank table. |
Step 10: Deploy Your Project to the Live Web
A project resting solely on your localhost:3000 has zero visibility. Deploying your application to a public cloud URL transforms your project from a private homework assignment into a shareable portfolio piece you can showcase to recruiters and interviewers.
Local Code Editor ──▶ Git Commit & Push ──▶ GitHub Repository ──▶ Cloud Webhook (Vercel/Render) ──▶ Automated Production Build ──▶ Live Public HTTPS URL
Recommended free deployment platforms for beginners in 2026:
- Frontend (React / Vite / Static HTML): Vercel, Netlify, or GitHub Pages (free, instant SSL, custom domains).
- Backend APIs (Node.js / Express / Python FastAPI): Render, Railway, or Fly.io.
- Cloud Databases: Supabase, Neon PostgreSQL, or MongoDB Atlas (generous free tiers).
Step 11: Add Your Project to GitHub with Professional Polish
Recruiters and senior engineering managers look closely at your GitHub profile. A repository with a single commit titled "first commit" and no README creates an unpolished impression. Treat your repository like a professional open-source product:
📁 Clean Repository Directory Structure
├── public/
├── src/
│ ├── components/
│ ├── context/ or store/
│ ├── utils/
│ └── App.tsx
├── .gitignore ← Ensure node_modules & .env are excluded!
├── package.json
├── README.md ← Comprehensive overview with live demo link
└── LICENSE
Step 12: Improve Your Project in Iterative Versions
Once Version 1.0 is deployed and working, don't immediately jump to a completely new project. Real engineering growth happens when you iterate, refactor, and add sophisticated features to an existing codebase:
Version 1.0 (MVP)
Basic CRUD functionality, local state, responsive styling.
Version 2.0 (UX & Search)
Debounced search, column sorting, pagination, and toast notifications.
Version 3.0 (Persistence & Auth)
REST API integration, database persistence, user authentication, and roles.
Version 4.0 (Production Hardening)
Unit tests with Vitest/Jest, CI/CD GitHub Actions, performance optimization.
Beginner Coding Project Ideas by Difficulty Level
Here is a curated directory of real-world projects categorized by complexity and tech requirements:
1. Standard Calculator
Arithmetic operations, operator precedence, clear/delete history.
2. Category-Based To-Do App
Task lists with checkboxes, priority badges, and LocalStorage save.
3. Timed Quiz Application
Multiple-choice questions, score tracking, countdown timer, results summary.
4. Expense Tracker with Charts
Income vs expenses, category filtering, balance calculation, visual charts.
5. Real-Time Weather Dashboard
City search, 5-day forecast, dynamic weather icons, geolocation support.
6. Student Management Portal
Full CRUD operations, student search, course enrollment, database persistence.
7. Job Application Tracker (Kanban)
Drag-and-drop status columns (Applied, Interview, Offer, Rejected) with notes.
Example Walkthrough: Building a Student Management System
Let's examine how the theoretical steps translate into actual project architecture across five distinct engineering phases:
Phase 1: User Interface Scaffold
Build the core layout: header navigation, a search toolbar, a student table component with column headers, and a modal form with inputs for Name, Email, Phone, and Course.
Phase 2: Data Schema Definition
Structure the data object: { id: string, name: string, email: string, phone: string, course: string, enrolledAt: string }. Create an initial array of mock student objects for testing.
Phase 3: CRUD Implementation
Implement Create (form submission appends to array), Read (table renders array), Update (edit button populates form with selected ID and overwrites on save), and Delete (filter out ID on confirm).
Phase 4: User Experience & Edge Cases
Add loading spinners during async calls, friendly empty state banners when no records exist, regex validation on email input, and confirmation modals before deleting.
Phase 5: Cloud Persistence & Deployment
Connect frontend to a live REST API with database storage, deploy the frontend on Vercel and backend on Render, and test production endpoints.
Common Mistakes to Avoid While Building Projects
Keep these common pitfalls in mind as you embark on your first development journey:
- Building Something Too Big: Don't try to build an entire social network with streaming video on your first try. Start small, finish it, and level up.
- Copy-Pasting Entire Tutorials: If you copy an instructor's code file by file without modifying variables or experimenting, you are practicing typing, not software development.
- Adding Unnecessary Libraries: Don't install 30 npm packages for features you can write in 5 lines of plain JavaScript. Keep your dependency tree clean.
- Ignoring Error Handling: Failing to handle network disconnects, null values, or invalid inputs makes applications fragile in production.
- Not Using Git from Day One: Commit frequently with clear messages. If a code change breaks everything, Git lets you roll back in one second.
- Abandoning Projects Halfway: Finishing a project is an engineering skill. Push through the difficult 80%–100% polish phase to achieve completion.
How to Make Your Project Resume-Worthy
Recruiters review hundreds of junior resumes every week. Vague descriptions like "Built a student management website using React" fail to convey technical depth. Frame your projects with clear technical scope, architectural decisions, and tangible engineering outcomes:
Notice: Never fabricate fake metrics (e.g. "improved company revenue by 400%"). Focus on genuine technical specifications: number of endpoints, architecture patterns, validation logic, and deployment workflows.
Project Documentation Template (GitHub README.md)
Use this production-ready template for your repository's README.md to make your code immediately understandable to technical interviewers:
A lightweight, full-stack student records management portal built with React, Node.js, and PostgreSQL.
🔗 **Live Demo:** [https://student-portal-demo.vercel.app](https://student-portal-demo.vercel.app)
## 🚀 Features
- **CRUD Operations:** Create, read, update, and delete student records with instant state sync.
- **Instant Search & Filter:** Debounced search by student name, email, or enrolled course.
- **Client-Side Validation:** Email format checks and required field validation.
- **Responsive UI:** Clean interface optimized for desktop, tablet, and mobile browsers.
## 🛠️ Tech Stack
- **Frontend:** React 18, TypeScript, Tailwind CSS / Vanilla CSS
- **Backend:** Node.js, Express.js REST API
- **Database:** PostgreSQL (hosted on Neon / Supabase)
- **Deployment:** Vercel (Frontend), Render (API)
## ⚙️ Local Installation & Setup
1. Clone the repository:
git clone https://github.com/yourusername/student-portal.git2. Install dependencies:
npm install3. Set environment variables: copy
.env.example to .env4. Start development server:
npm run dev## 🔮 Future Roadmap
- [ ] Add JWT authentication & role-based access for teachers vs administrators
- [ ] CSV export functionality for student rosters
- [ ] Automated end-to-end testing with Playwright
Final Project Completion Checklist
Before sharing your project with recruiters or adding it to your portfolio, verify every item on this quality checklist:
📋 Pre-Launch Verification Checklist
☑️ Form Validation: Invalid, malformed, or empty inputs trigger clear, helpful UI error messages.
☑️ Responsive Design: Layout adjusts cleanly on both mobile screens (375px) and desktop viewports.
☑️ Git Cleanliness: Sensitive credentials (
.env) and node_modules are strictly git-ignored.☑️ Meaningful Commits: Commit history reflects incremental development steps rather than a single bulk commit.
☑️ README Documentation: Repository contains an informative README with setup steps and live demo link.
☑️ Live Production URL: Application is deployed, accessible publicly over HTTPS, and verified live.
☑️ Interview Readiness: You can explain your tech choices, file structure, and how you solved your biggest bug.
Final Thoughts
Your first coding project does not need to be world-changing. It simply needs to be finished.
Start with a small, manageable problem. Write down the functional requirements. Build the simplest working MVP. Methodically debug errors using console logs and documentation. Write tests for edge cases. Commit your work with clean Git messages and deploy it live to the cloud.
The goal is not to write flawless code on your very first attempt. The true breakthrough is crossing the threshold from "I watch tutorials about code" to "I can take an idea, break it down, write the code, fix the errors, and build real software on my own." That confidence is the foundation of every successful programming career.
Frequently Asked Questions
Q1. What should I build as my very first coding project?
Start with a focused, small-scale application such as a calculator, to-do list, interactive quiz app, expense tracker, or notes app. These classic projects exercise fundamental programming concepts (variables, arrays, objects, loops, functions, and user events) without overwhelming you with complex business logic.
Q2. Should I follow a tutorial for my first project?
Tutorials are great for learning syntax and conceptual paradigms, but you should strive to build at least 70% of your project independently. If you get stuck on a specific feature (e.g. how to filter an array in JavaScript or connect to a database), look up that specific concept in official documentation rather than copying an entire project video step-by-step.
Q3. How big or complex should my first coding project be?
Keep the first version (MVP) intentionally small — ideally 3 to 5 core features that you can complete within 1 to 2 weeks. Finishing a small project provides momentum and closure; you can always add advanced capabilities (like user authentication or database integration) in subsequent iterations.
Q4. Should beginners put their early projects on GitHub?
Yes, absolutely. Learning Git and GitHub early is an essential industry skill. It provides a secure cloud backup of your code, establishes a transparent record of your daily coding habit, and demonstrates to employers that you understand standard version control workflows.
Q5. Is it necessary to deploy my beginner project online?
Yes. Deploying your application to free hosting platforms like Vercel, Netlify, or Render teaches you how production builds and environment variables work. More importantly, having a clickable live URL in your resume allows recruiters to instantly interact with your work without needing to download and compile your source code.
Q6. Can a beginner project actually help me get an internship or job?
Yes, provided you can clearly articulate what you built, why you chose your tech stack, what architectural challenges you faced, and how you resolved unexpected bugs. Recruiters hire junior developers who demonstrate genuine problem-solving ability and engineering curiosity rather than rote memorization.
🚀 Want 1-on-1 Mentorship to Build Portfolio-Ready Projects?
Build industry-grade applications under the personal guidance of experienced software architects at EduQuest Aptech Learning. Connect with our academic counseling team at +91 99580 41888 or visit our tech campus at Galleria Market, DLF Phase-IV, Sector 28, Gurugram for personalized project guidance, resume reviews, and placement assistance.